 SoftEther VPN Client communicates over a VPN by creating a Virtual Network Adapter on the system. The Virtual Network Adapter is recognized by the Windows operating system and applications running on Windows as a network device in the same way as a physical network adapter. This enables the user to use the Virtual Network Adapter with TCP/IP protocols and other network protocols (such as NetBEUI).
Creating a Virtual Network Adapter
When the VPN client is first installed, there will be no Virtual Network Adapters registered. The user can freely create as many Virtual Network Adapters as needed.
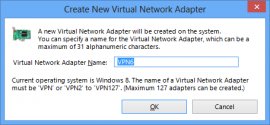
Each new Virtual Network Adapter must be given a name. A name consists of up to 31 alphanumeric characters. However, names are limited to four characters under Windows 98 Second Edition and Windows Millennium Edition. When multiple Virtual Network Adapters are created, the Virtual Network Adapter names must all be different.
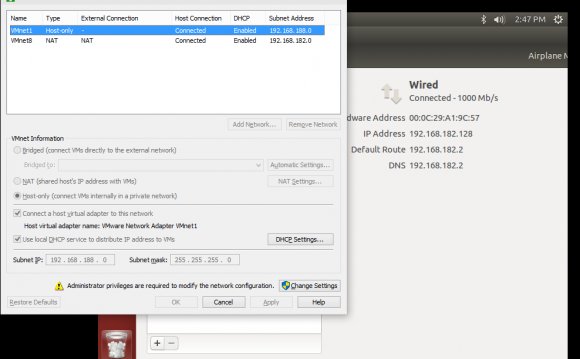
Only users with administrator privileges on the computer can change Virtual Network Adapter settings. Only users who can connect to and control the VPN client service on the computer can create or delete Virtual Network Adapters.
 To create a new Virtual Network Adapter, click [Create Virtual Network Adapter] under [Virtual Adapter] menu in the VPN Client Manager.
New Virtual Network Adapter Creation Dialog.
Normal Virtual Network Adapter Settings
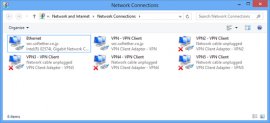
A newly created Virtual Network Adapter will be recognized as a Windows device. It will be displayed as a [new network connection] icon in [Network Connections] in the Windows Control Panel.
If, for example, the name of the newly created Virtual Network Adapter was "ABC", that Virtual Network Adapter device name will be registered and displayed as "VPN Client Adapter - ABC" in the Device Manager. Also, the name of the icon registered in the Control Panel's [Network Connection] window will be "ABC - VPN client". The user can change this name at any time.
Virtual Network Adapter Display in Network Connections.
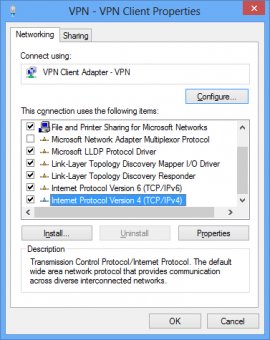
The TCP/IP protocol and other settings for the Virtual Network Adapter can be set in the same way a normal network adapter is set by right clicking the VPN client Virtual Network Adapter's icon in the Control Panel's [Network Connections] folder and selecting [Properties]. When a new Virtual Network Adapter was created, the user can set the protocol and clear any unneeded service bindings in the same manner as the user would for a physical network adapter. For details on the settings, please ask the administrator for the VPN server you want to connect to.
Virtual Network Adapter Network Properties.
Changing Advanced Settings
The following Virtual Network Adapter settings can be changed in the properties for a VPN client Virtual Network Adapter registered in the Windows Device Manager. Note that the VPN connection will be temporarily closed if these settings have been changed while the Virtual Network Adapter is being used for VPN communication.
| Item | Description | Default |
| Indicate Speed (Mbps) | 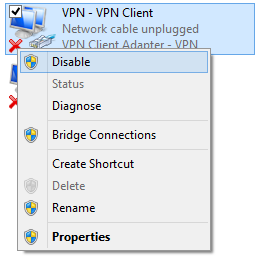 Specifies the datalink speed in Mbps that the Virtual Network Adapter reports to the operating system. Windows recognizes that the maximum communication rate supported by the Virtual Network Adapter is the value set here. The actual communication rate is not influenced by the value set here. Although normally no problems will occur if this setting is left at 100 Mbps, if the physical connection used for VPN communication have a maximum rate of only 10 Mbps, this value may be set to 10 Mbps. Specifies the datalink speed in Mbps that the Virtual Network Adapter reports to the operating system. Windows recognizes that the maximum communication rate supported by the Virtual Network Adapter is the value set here. The actual communication rate is not influenced by the value set here. Although normally no problems will occur if this setting is left at 100 Mbps, if the physical connection used for VPN communication have a maximum rate of only 10 Mbps, this value may be set to 10 Mbps. |
100 (Mbps) |
| MAC Address | Specifies the value of the MAC address held by the Virtual Network Adapter. This item can be set to any value that can be used as a MAC address. When specifying a MAC address, specify a consecutive sequence of hexadecimal digits. (No hyphens or colons are required.) | A 4-byte value that consists of "00:AC" (fixed) followed by a random number is used as the initial MAC address. |
Virtual Network Adapter Device Driver Setting Window.
Removing a Virtual Network Adapter
Once a Virtual Network Adapter has been added by the user, it remains in the system until the user removes it manually. There are two ways to remove a Virtual Network Adapter as shown below. These methods for removing a Virtual Network Adapter are equivalent.
- Removal using the Windows Device Manager
- Removal using the VPN Client Manager
Enabling and Disabling a Virtual Network Adapter
A Virtual Network Adapter registered in the system can be enabled or disabled at any time. When a new Virtual Network Adapter is created, it will be in the enabled state. When a Virtual Network Adapter is disabled, Windows handles it as though it has been disconnected from the system.
The Virtual Network Adapter enable/disable operations are performed from either the VPN Client Manager or the Windows Device Manager or [Network Connections] window.
Disabling a Virtual Network Adapter.
Messages Indicating that a Network Cable is Unplugged
Under Windows 2000 and later, when a new Virtual Network Adapter is created, an icon is displayed in the task tray at the lower right of the task bar and "A network cable is unplugged." message is displayed. This is normal operation.
YOU MIGHT ALSO LIKE


Share this Post
latest post
-
 Split Ethernet cable into two February 10, 2019
 -
 What is Ethernet Patch Cables? February 5, 2019
 -
 Military Fiber Optic cable January 31, 2019
 -
 Networking cable types January 26, 2019
 -
 Fluke Ethernet cable Tester January 21, 2019
 -
 Molex Fiber Optic cable January 16, 2019
 -
 Buy Ethernet Cables online January 11, 2019
 -
 Harford County cable Network January 6, 2019
 -
 Serial to Ethernet cable January 1, 2019