 Cutting the holes for the plates into the walls was definitely a difficult experience for me. Although I have cut numerous holes in other people's walls in order to fish cable, it is scary to watch someone cut a hole in the newly painted wall of your new home. All kidding aside, things were fine once the holes were cut and the cables were then fished down from the attic to the bedrooms on the second floor.
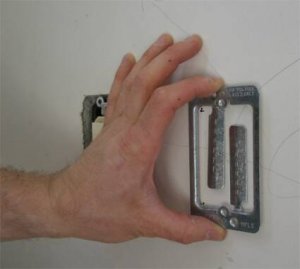
After the cables have been fished down from the attic, a metal carrier was placed into the cut hole to allow the attachment of the plate. For the cutting of the holes, a standard drywall saw was used; however, no cutting occurs until the proper height and location are determined. In order to get a good square cut at the proper height, a tape measure and level are used. While there is some play in the metal carrier to get the plate level once you place the connectors on the end of the cable, it is important to make sure that you cut the hole at the right height.
First line up and measure the distance of the carrier insert from the floor, then make an outline of the carrier. Of course you should have used a stud finder prior to this to make sure that you don't hit a stud by accident.
The cut is then connected through the four points.
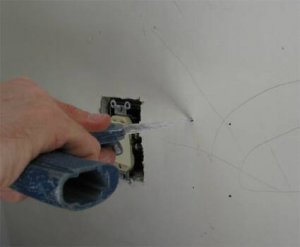
The completed hole.
The last step is to secure the carrier to the wall with the supplied screws. Once this is done, the cables are then fished through the carrier.
We had to repeat the process of pulling cables up from the basement several times because we didn't have enough boxes of cable to pull all the runs at once. If you are going to tackle this job yourself, you will find that you will need at least one box of cable per connection in the plate. The most complex plate configuration we had was the Type Two plate, which required us to pull four cables at a time per plate.
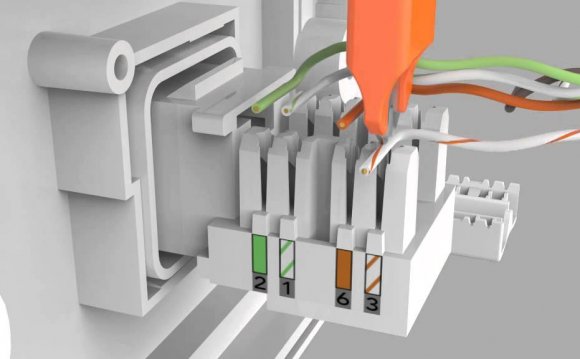
In this configuration, we were pulling one CAT-6 for Ethernet, one CAT-5 for the telephone, and two RG-6s for the two satellite connections. As you can see, if you have a large quantity of cable to pull, you can save time if you have multiple boxes of cable to pull from. Again, it is important to remember to label both the cables on the start of the pull and the end before you cut it off. This will save significant time during the final punch-down process.
YOU MIGHT ALSO LIKE


Share this Post
latest post
-
 Split Ethernet cable into two February 10, 2019
 -
 What is Ethernet Patch Cables? February 5, 2019
 -
 Military Fiber Optic cable January 31, 2019
 -
 Networking cable types January 26, 2019
 -
 Fluke Ethernet cable Tester January 21, 2019
 -
 Molex Fiber Optic cable January 16, 2019
 -
 Buy Ethernet Cables online January 11, 2019
 -
 Harford County cable Network January 6, 2019
 -
 Serial to Ethernet cable January 1, 2019