 When running ethernet cable through a home or business, it is far more cost effective to use bulk cable and terminate the ends yourself. This allows you to use exact cable lengths, have it be easier to pull through walls, and it saves you money. If you're doing this for the first time you'll need to know how to terminate the cables. If you just need to review the pinouts, skip to the .
1.
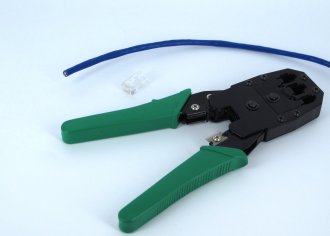
In order to terminate cat 5, cat 5e, or cat 6, we'll need the cable, RJ45 terminating tips, and an RJ45 compatible crimper.
2.
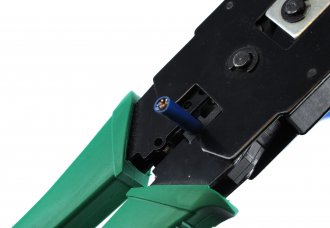
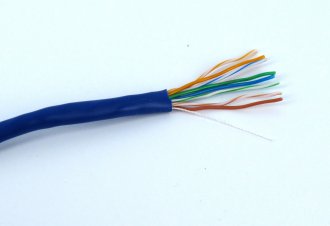
Once you have the necessary components the first thing you need to do is strip the jacket off from the cable. Using the stripping blade on the crimper, strip about an inch of the jacket from the cable. Be careful to not press to hard and cut the wires inside.
 3.
3.
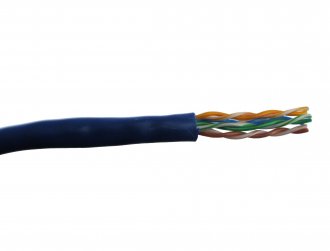
Once the jacket has been removed you'll have 4 pairs of wire. Each pair consists of a solid colored wire and a white wire with a stripe of the same color as the solid colored wire.
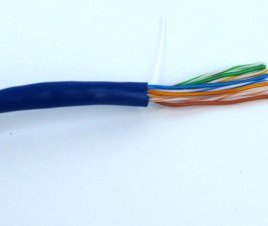
4.
Next you'll want to untwist each pair of wire to make them easy to rearrange. You may have to untwist them a little further than what is exposed from the jacket in order to make them easy to move.
5.
It is best practice to stick to a standardized wiring scheme, but the most important part is that you're consistent on both sides of the cable.The T568A standard wiring scheme is a good standard pinout to use when wiring your cat 5. Order the wires from left to right in the order light green(white with green stripe), green, light orange, blue, light blue, orange, light brown, brown.
6.
If the wires are coming too far out of the jacket the tip won't be as secure on the wire. Use the wire cutting tool on the crimper to trim the wire back to about a half-inch.
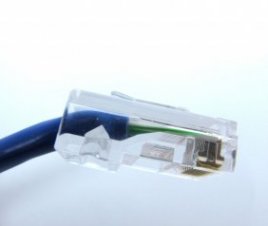
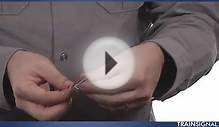
7a.
Now that our wires our prepped we need to install the tip. Slide the tip over the wires with the light green wire being in the top pin if the tip is held like in the picture. Once the cable is slid into place you need to make certain that everything is well placed. Check all the wires to make certain they are still in the correct order and that all the wires reach the end of the tip. Also, make certain that the cable jacket goes far enough into the tip so that it is beyond the part of the tip that will be pressed up into the cable jacket. This will help to keep the wire from pulling out of the tip.
7b.
The pinout is rather important. The layout of the wires has 2 standards. They were designed to keep gigabit speeds and have a universal installation. You can use T568B OR T568A standard. The same connection is used on both ends of the cable. Do NOT use T568B on one end, and then T568A on the other. In the step above, we used T568A.
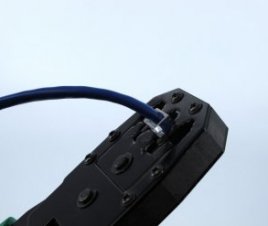
8.
With the wires properly placed in the tip, place the tip into the crimper. Be careful as you insert the tip to not pull the wires out of it.
9.
With the tip in place, squeeze the crimper and make certain that you squeeze hard enough to crimp all 8 wires and secure the jacket.
10.
Remove the tip from the crimper and double check that all of the wires have been properly pierced and that the jacket has been secured. If so, you're done with the first end. Simply repeat these steps for the other end of the cable and you'll have a finished custom length ethernet cable.

YOU MIGHT ALSO LIKE


Share this Post
latest post
-
 Split Ethernet cable into two February 10, 2019
 -
 What is Ethernet Patch Cables? February 5, 2019
 -
 Military Fiber Optic cable January 31, 2019
 -
 Networking cable types January 26, 2019
 -
 Fluke Ethernet cable Tester January 21, 2019
 -
 Molex Fiber Optic cable January 16, 2019
 -
 Buy Ethernet Cables online January 11, 2019
 -
 Harford County cable Network January 6, 2019
 -
 Serial to Ethernet cable January 1, 2019