 Wireless networks may be convenient, but wired networks beat Wi-Fi in every other way. Wired networks are faster, they're always reliable, and they're secure. Unless you're sitting on the couch with a laptop, or connecting a Wi-Fi-only device, such as an iPad, wired ethernet is the better way to go.
But what should you do about the tangle of wires? Homeowners can run cables inside the walls, potentially increasing the value of their house for tech-savvy buyers. I'm making a few home upgrades and began wiring it up for ethernet even before it had a working bathroom. (I have my priorities.) Here's how you can do the same in your house.
Make a Plan
The author, suited up for crawling under the house to make friends with small spiders and to wire a jack on the opposite side of the living room.Before you start laying cable, take time to figure out a few things. Where do you need ethernet jacks? Where will your central networking hardware sit? What are your logistical limitations? (If you aren't sure whether you need ethernet, read our "The Ultimate Guide to Home Networking" for tips on determining the right networking technology for you.)
 I wired ethernet to six areas throughout my small house: two in my office, one in the bedroom, two in the living room, and one in the kitchen. Each length of cable goes back to a closet containing the networking hardware, in a "home-run" layout.
Since I was committed to doing this project anyway, I decided to overdo it a little, running multiple cables to nearly every location. As a result, I can configure advanced networks, with the ability to do such things as completely isolate certain devices at the same location from each other, or even to directly connect something to the Internet. I put four ethernet jacks at each location in the office and living room, and single ethernet jacks in the bedroom and the kitchen.
My setup is likely overkill for many people. You might prefer to run just one or two cables to each location. If you have multiple devices-such as a TiVo, a PlayStation 3, and an Xbox 360-you can connect a switch outside your wall to add more ports.
Draw a schematic diagram of your house, including each use location, to visualize your plan. Any problems you can solve now will help the process run more smoothly.
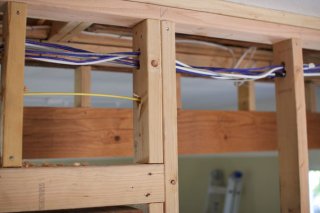
 How are you going to get the cables to each spot? In my case, I had a few walls open for some remodeling, which helped. But I still needed to run all of the wires up to the second-floor closet (network room) and from there into the attic and down a central wall to reach each destination. Know why contractors start their workdays so early? It's not just to taunt us. Part of the reason is that the temperature in a typical attic (mine) reaches about 120°F on a summer afternoon.
As part of my wiring project, I took a bundle of cables all the way down to the crawl space under the house, going under the living room to reach the other side. Individual situations vary, but attics, basements, air ducts, and crawl spaces can make great conduits.
Order the Parts
Now that your plan outlines where everything should go, order the specific cables and parts you need. I recommend finding a cheap online source instead of trying to pick up these items locally at retail; since you'll be buying dozens of parts, even small savings per unit will add up. I went with Monoprice.com for everything.
 Ethernet cables come with different ratings. Pick Category 5e or better, such as Cat 6. Cat 5e wires support 1000Base-T connections (gigabit), while Cat 6 cables can handle 10-gigabit speeds-but most home computers and other devices don't go that fast, so I saved a little money and picked Cat 5e.
For most situations, unshielded twisted-pair (UTP) cables will be fine. If you're wiring a huge house or know that you'll have to run the cables next to electrical wiring and other in-wall hazards, consider using the more expensive shielded twisted-pair (STP) wiring to give the connection better insulation. I picked solid-core cables instead of stranded wires because they work better with the ethernet jacks that I chose.
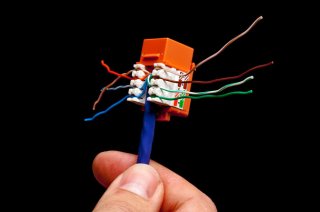
Keystone jacks come in various specifications. The one shown here is a Cat 5e keystone jack.You can pay more for in-wall rated cables, including plenum cables encased in a fire-retardant jacket. Your local building codes might have a preference, but I opted for standard wiring.
Order spools of cable, likely in 1000-foot amounts. Though your whole job will probably come in at less than 1000 feet, I recommend running at least two spools at a time (I used three) to speed up the process by laying out pairs together.
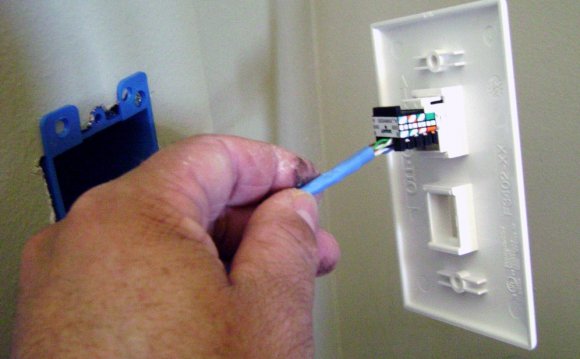
At each outlet, you'll wire each cable into an ethernet keystone jack. This jack interfaces with a modular, keystone wall plate that lets you insert combinations of RJ45 (ethernet), RJ22 (phone jacks), coaxial (cable TV), and other plugs. Figure out how many wall plates and ethernet jacks you'll need, and order a few extra. I picked Cat 5e jacks again, but if you're wiring for Cat 6, buy those instead.
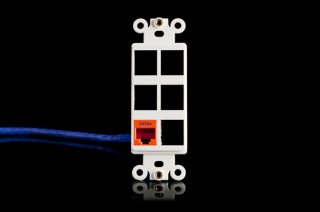
A modular keystone wall plate is designed to receive various keystone jacks attached to your interior cabling.Finally, though you can screw the wall plates directly into sheetrock if necessary, you'll be better off visiting a hardware store and buying a single-gang cut-in electrical box for outlets you're placing in an existing wall. For open walls, just screw single-gang plaster rings into conveniently located studs; afterward, you'll put sheetrock in front.
YOU MIGHT ALSO LIKE


Share this Post
latest post
-
 Split Ethernet cable into two February 10, 2019
 -
 What is Ethernet Patch Cables? February 5, 2019
 -
 Military Fiber Optic cable January 31, 2019
 -
 Networking cable types January 26, 2019
 -
 Fluke Ethernet cable Tester January 21, 2019
 -
 Molex Fiber Optic cable January 16, 2019
 -
 Buy Ethernet Cables online January 11, 2019
 -
 Harford County cable Network January 6, 2019
 -
 Serial to Ethernet cable January 1, 2019